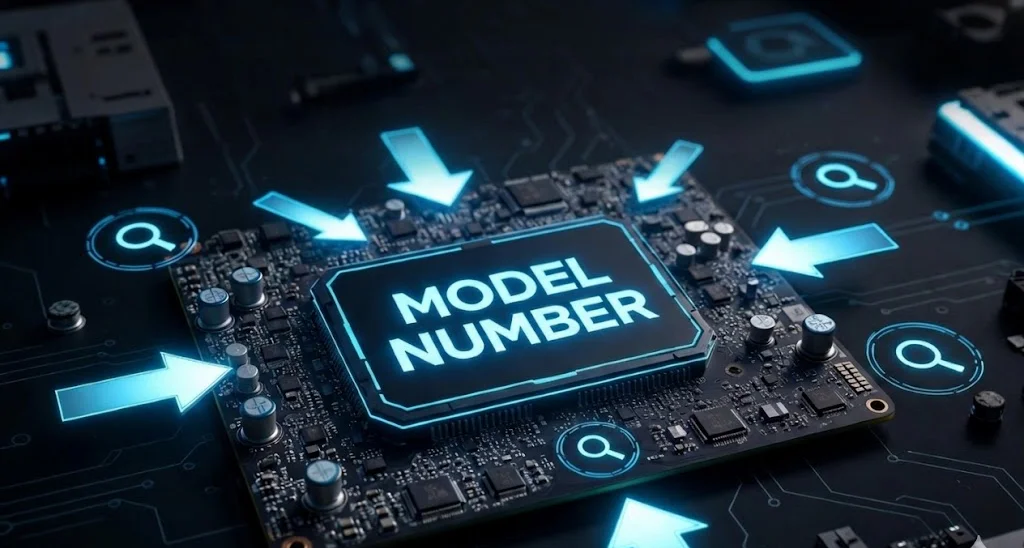
How to Check Motherboard Model
How to Check Motherboard Model: The Ultimate Simple Guide to Identifying Your Hardware
Have you ever wondered what exactly is inside that glowing computer case on your desk? Identifying your hardware is the first step toward becoming a tech-savvy pro. Whether you want to upgrade your RAM, swap out a processor, or simply update your drivers, you need to know your baseboard details. Knowing how to check motherboard model information is a superpower that saves you time and money. In this guide, we will walk through the easiest ways to find this info without even opening your computer case.
The motherboard is basically the heart and soul of your entire PC system. It connects every single part, from your mouse to your high-end graphics card. If the motherboard isn’t happy, nothing else works correctly. That is why finding the specific model number is so vital for troubleshooting and maintenance. You don’t need to be a computer scientist to master this skill today. We have designed this friendly guide to help you navigate your Windows settings and command tools with total confidence and ease.
Why Knowing Your Motherboard Model Matters for You
Most people go years without thinking about their motherboard until something goes wrong. However, being proactive is much better than being reactive in the world of technology. When you know your specific model, you can download the exact BIOS updates needed for peak performance. It also helps you verify compatibility before you spend hard-earned money on new hardware components. Imagine buying a fast new SSD only to realize your board doesn’t support the latest speeds. We want to help you avoid those frustrating and costly mistakes.
Beyond upgrades, knowing your hardware specs is essential for proper technical support. If you ever need to call a professional or post on a tech forum, the first thing they will ask for is your system summary. Providing a precise model name like “ASUS ROG Strix Z790” is much better than saying “it’s a black board.” It shows you are an informed user who takes care of their machine. Let’s dive into the most effective methods to get these details quickly and accurately.
Quick Summary Table: Motherboard Identification Methods
| Method Name | Speed | Difficulty Level | Best For |
| System Information | 30 Seconds | Very Easy | Beginners & General Users |
| Command Prompt | 20 Seconds | Easy | Quick Copy-Paste Text |
| PowerShell | 20 Seconds | Easy | Advanced Data Retrieval |
| Third-Party Tools | 2 Minutes | Moderate | Detailed Hardware Enthusiasts |
| Physical Inspection | 5 Minutes | Hard | When the PC won’t turn on |
Method 1: Using the System Information Tool
The easiest way for most people to learn how to check motherboard model details is through the built-in System Information tool. Windows keeps a detailed log of everything inside your machine, and this tool is the library for that data. Simply press the Windows key on your keyboard and type “System Information” into the search bar. When the app opens, look for the “System Summary” section on the left. You are looking for two specific lines: “BaseBoard Manufacturer” and “BaseBoard Product.”
This method is wonderful because it requires zero technical commands or risky software downloads. In the “BaseBoard Product” field, you will see the exact name of your motherboard. Sometimes, it might say “Not Available” if you have a pre-built laptop from a big brand like Dell or HP. In those cases, the “System Model” at the top usually serves as the primary identifier. This tool provides a clean, readable interface that anyone can understand regardless of their technical background or previous computer experience.
Method 2: How to Check Motherboard Model via Command Prompt
If you want to feel like a real computer hacker, the Command Prompt is your best friend. This method is incredibly fast and allows you to copy the text directly into a search engine. To start, right-click your Start button and select “Command Prompt” or “Terminal.” Once the black window appears, you just need to type one simple command. Don’t worry; you don’t have to memorize it. You can simply copy it from here and right-click in the terminal to paste it instantly.
Type the following: wmic baseboard get product,Manufacturer,version,serialnumber. After you hit the Enter key, the magic happens. Your computer will instantly display the maker of the board and the specific model number. This is often the most reliable way to find how to check motherboard model data because it pulls directly from the hardware firmware. It avoids the clutter of menus and gives you the raw facts you need to move forward with your PC project or driver update.
Method 3: Utilizing Windows PowerShell for Precision
PowerShell is like the older, more powerful brother of the Command Prompt. It is built for modern Windows versions and offers even more detail if you need it. To use this method, search for “PowerShell” in your taskbar and run it as an administrator. Once the blue window pops up, you are ready to go. Many tech experts prefer this method because it is highly accurate and rarely fails to fetch the data from the system BIOS.
In the PowerShell window, type: Get-WmiObject win32_baseboard | select-object Manufacturer, Product, SerialNumber, Model. This command is slightly more detailed than the previous one. It provides a structured look at your motherboard’s DNA. This is particularly helpful if you are trying to verify a warranty or check if your board is a specific “v2” or “v3” revision. Getting the revision right is crucial because different versions of the same board might require different software drivers to function.
Method 4: Finding Details in the Windows Settings Menu
For those who prefer a modern look, the Windows 10 and 11 Settings menu has improved significantly. While it doesn’t always show the motherboard name directly, it gives you the “System Model.” Often, for laptops and pre-built gaming rigs, the system model name is synonymous with the motherboard configuration. Go to Settings, then click on “System,” and finally scroll down to “About.” This page gives you a bird’s-eye view of your processor, RAM, and device ID.
If you see a model name like “Alienware m15 R7,” that is your ticket to finding the right parts. You can take that model name to the manufacturer’s website to see exactly which motherboard is inside. This method is very user-friendly and doesn’t involve any “scary” code. It is perfect for casual users who just want to know what they are working with. Always remember that your “Device Specifications” are the starting point for any successful hardware journey or troubleshooting session.
Method 5: Using Professional Third-Party Software
Sometimes, the built-in Windows tools don’t give enough detail. If you are an enthusiast who wants to know the temperature of your VRMs or the speed of your bus, third-party tools are the way to go. Programs like CPU-Z or Speccy are famous in the PC community for being safe, free, and incredibly detailed. Once you download and run CPU-Z, navigate to the “Mainboard” tab. It will show you the chipset, the BIOS date, and the graphic interface details.
Using these tools is like getting an X-ray of your computer. They provide more than just the name; they show you the current health and configuration of your hardware. If you are wondering how to check motherboard model details while also checking your RAM timings, this is the best choice. Just make sure to download these tools from official websites to keep your computer safe. These apps are lightweight and won’t slow down your system, making them a staple for any PC builder.
Method 6: Checking the Physical Board Itself
What happens if your computer won’t turn on at all? In this scenario, software won’t help you. You will need to take a look inside the “hood” of your PC. Before you do this, always ensure your computer is unplugged and you have touched a metal surface to discharge static electricity. Open the side panel of your case. Manufacturers usually print the model name in large, white letters directly on the circuit board, often between the CPU and the GPU slot.
This is the most “foolproof” way to identify a motherboard. You might see a name like “B550 TOMAHAWK” printed clearly on the surface. If you are using a laptop, this is much harder, as motherboards are hidden deep inside. For laptops, it is better to look at the sticker on the bottom of the device. That sticker contains the “Serial Number” or “Service Tag.” You can enter that code on the manufacturer’s website to see the original “as-shipped” motherboard configuration for your specific unit.
Method 7: Looking at the Original Packaging or Receipt
If you built your PC yourself, the easiest way to find your specs is to look at your purchase history or the box in your closet. Most PC builders keep their motherboard boxes because they contain extra cables, screws, and the manual. The box will have the full name, the chipset (like Z690 or X570), and the brand logo prominently displayed. This saves you from having to run any commands or open your computer case at all.
Even if you lost the box, check your email for an order confirmation from retailers like Amazon, Newegg, or Best Buy. Searching your inbox for the word “Motherboard” will likely bring up the exact product page of what you bought. This is a great habit to get into. Keeping a digital folder of your PC parts makes it so much easier when you decide to sell your parts later or need to claim a warranty for a faulty component.
Method 8: Using the DirectX Diagnostic Tool (DxDiag)
The DirectX Diagnostic Tool is another hidden gem in Windows. While it is mostly used for troubleshooting video and sound issues, it also displays system information. To open it, press Windows + R, type “dxdiag,” and hit Enter. On the first tab, look for “System Manufacturer” and “System Model.” This tool is very reliable and comes pre-installed on every version of Windows, so you never have to worry about missing it.
The benefit of DxDiag is its simplicity. It presents the most important information in a single, clear window. If you are a gamer, you might already be familiar with this tool for checking your DirectX version. Now you know it can also help you with how to check motherboard model identification. It’s a versatile utility that every Windows user should have in their mental toolkit for quick hardware checks and system verification.
Method 9: Entering the BIOS/UEFI Menu
If you want to go to the source of all information, you must visit the BIOS (Basic Input/Output System). This is the software that lives on the motherboard itself. To get there, restart your computer and repeatedly tap a specific key (usually F2, F12, or Del) before Windows starts loading. Once inside the BIOS, the motherboard model and BIOS version are usually displayed right on the main dashboard page.
This is the most advanced method, but it is also the most accurate. The BIOS doesn’t lie. It shows you exactly what hardware is connected and how it is performing. However, be careful not to change any settings while you are in there unless you know what they do. Just look for the model name, write it down, and exit without saving changes. This is a great way to verify that your software is reporting the same thing as your hardware.
Method 10: How to Identify Motherboard for Laptop Users
Laptops are a bit different from desktop computers. Since the motherboard is custom-made for the specific laptop chassis, the “Motherboard Model” is often just the laptop’s model name. For example, if you have a MacBook Pro or a Microsoft Surface, the internal board doesn’t have a separate retail name. To find your laptop’s specific identity, you can use the command wmic csproduct get name. This will give you the exact marketing name of your device.
Once you have that name, you can find the motherboard specs on the manufacturer’s support page. This is important for finding out how many RAM slots you have or if you can add a second storage drive. Laptop motherboards are highly integrated, meaning the CPU and sometimes even the RAM are soldered on. Knowing your model helps you understand what is “upgradeable” and what is “permanent,” which is vital information before you attempt any physical modifications.
Understanding Your Motherboard’s Chipset
Once you find your model name, you will notice a letter and number combination like “B550” or “Z790.” This is the chipset. The chipset determines what features your motherboard supports, such as overclocking, the number of USB ports, and the speed of your PCIe lanes. Knowing your chipset is just as important as knowing the model name. It tells you the “tier” of your motherboard, ranging from budget-friendly office boards to high-end workstation platforms.
For example, “Z” series boards for Intel are usually for enthusiasts who want to push their hardware to the limit. “B” or “H” series boards are typically for everyday users who want stability and value. When you learn how to check motherboard model details, try to identify the chipset as well. It will help you understand the true capabilities of your PC and whether it’s worth upgrading the CPU or if you should just buy a whole new platform.
Frequently Asked Questions (FAQs)
1. Can I find my motherboard model without opening the case?
Yes! As we discussed, using the System Information tool or the Command Prompt is the best way to do this without touching a single screw. It is fast, safe, and provides all the data you need.
2. Why does my system say “To Be Filled by O.E.M.”?
This usually happens with custom-built PCs or certain budget brands. It means the manufacturer didn’t “write” the name into the BIOS. In this case, use a third-party tool like CPU-Z or look at the physical board.
3. Is the Motherboard Model the same as the Serial Number?
No. The model name refers to the design (like “iPhone 14”), while the serial number is a unique ID for your specific unit. You need the model name for drivers and the serial number for warranty claims.
4. Do I need to update my motherboard drivers?
Only if you are experiencing issues or want to support new hardware. If your computer is running perfectly, “if it ain’t broke, don’t fix it” is usually a good rule for motherboard BIOS updates.
5. Will knowing my motherboard help me get more FPS in games?
Indirectly, yes! Knowing your model allows you to enable features like “XMP” or “DOCP” in the BIOS, which makes your RAM run at its full rated speed, often increasing gaming performance.
6. Can I check my motherboard model on a Mac?
Macs don’t use the term “motherboard” in the same way; they call it a “Logic Board.” You can find your Mac’s details by clicking the Apple icon > About This Mac > System Report.
Conclusion: You Are Now a Hardware Expert!
Knowing how to check motherboard model information is a fundamental skill for anyone who uses a computer. Whether you used the Command Prompt, the System Information tool, or looked at the physical board, you now have the data you need to take the next step. You can confidently buy upgrades, update your BIOS, or troubleshoot errors with the precision of a professional technician. No more guessing games or buying the wrong parts!
Technology can seem intimidating, but once you break it down into simple steps, it becomes much easier to manage. Your motherboard is the foundation of your digital life. By taking the time to learn about it today, you have ensured a smoother and more efficient computing experience for the future. If you found this guide helpful, feel free to share it with a friend who might be struggling with their own PC upgrades. Happy computing, and enjoy your newly discovered hardware knowledge!